Step 7: Publish and Share
Is your design ready to share and you want to make a snapshot version of the current state? Then you are ready to publish the design.
-
After publishing you can share the design.
-
Your design will stay private when you publish until you share it.
-
You'll unlock other goodies, like Batch Compute!
Step 1: Complete Your Design
Make sure your design is ready to publish:
- Test all inputs and parameters. Run a few calculations.
- Verify geometry displays correctly on different screen sizes.
Step 2: Publish the design
Publishing will incur a monthly cost! See more details about pricing here. This will happen directly when you click publish. You can cancel the subscription at any time by unpublishing the design.
- In your InForm design interface, look at the top right corner
- Find the Publish button (typically blue with a publish icon 📤)
- The button should be visible when you're in Livelink Mode
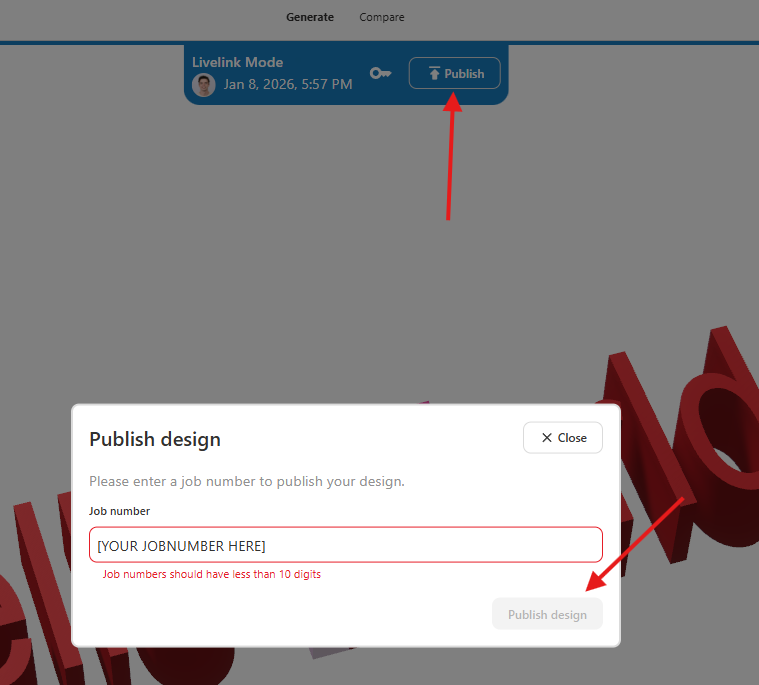
Step 3: Click the Publish Button
Great! You've successfully published your first design! 🙌🙌🙌🙌
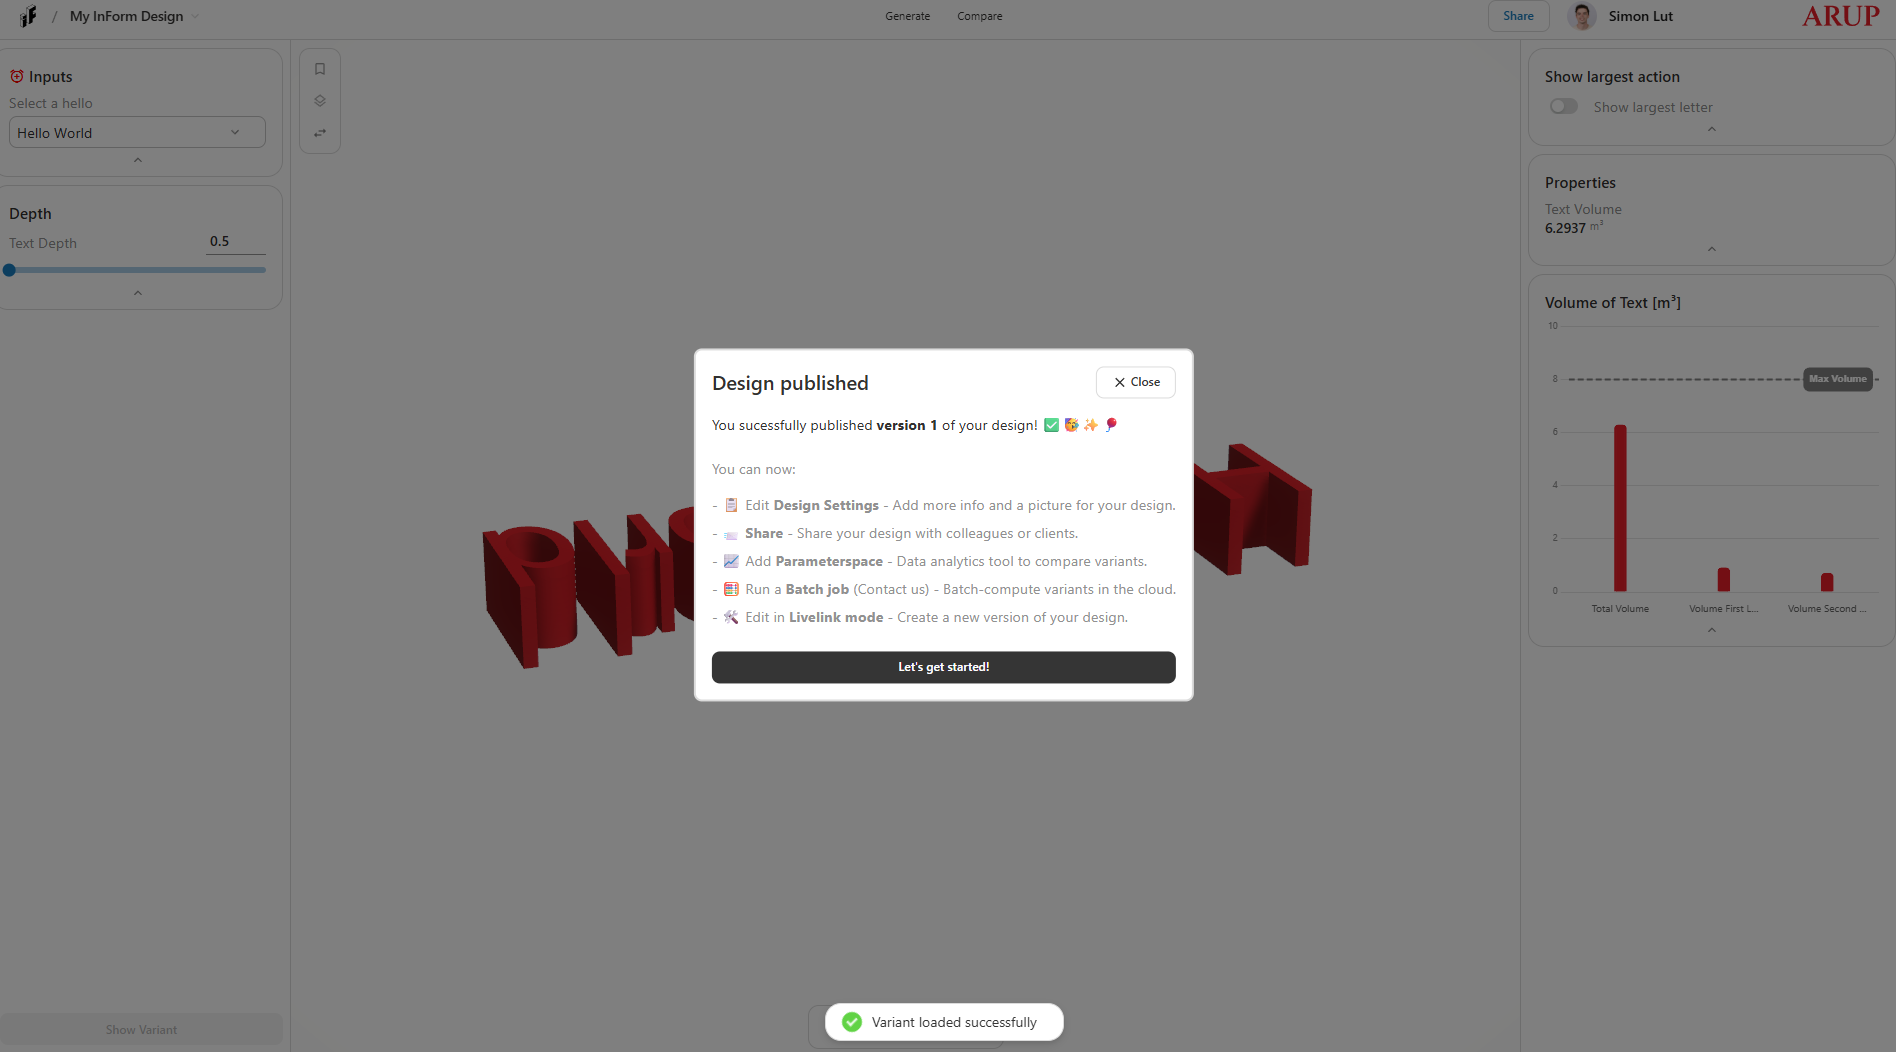
Step 4: Want to make changes?
- Click in the Livelink in the menu. The blue border indicates that you are in livelink mode for editing.
- You can now send models again from Grasshopper.
- In the meantime the current version will still be visible to anyone while you work on a new version in Livelink.
- Ready to publish a new version? Simply publish again and see the version increase.
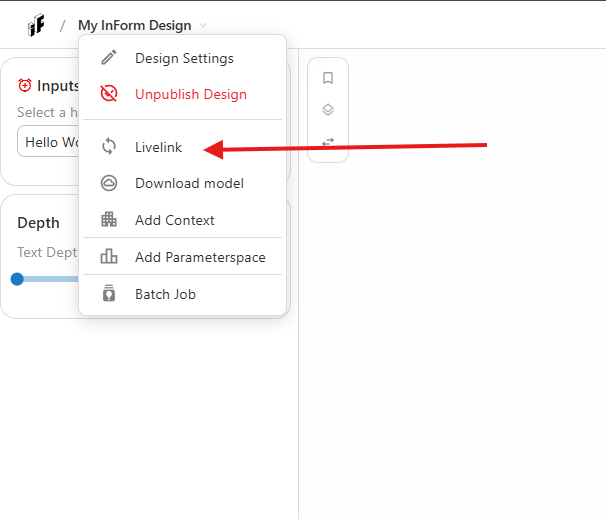
- Any Analysis Results or Presets will be removed when publishing a new version! You will need to compute them again for each version of your design.
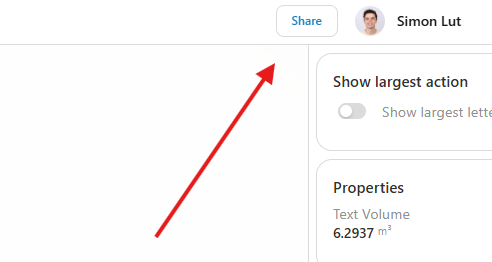
Step 5: Sharing your Design Internally
- Click on the share button in the top right corner.
- Share it with anyone you like within Arup.

Sharing Your Design Externally
To share the link externally, you'll need to set up an Arup guest account for your clients.
- Send a list of emails to the InForm team
- The InForm team will send invitations to create guest accounts
- You can add their emails in the share menu to the design.
- Your clients will follow the steps below to access the design.
Two versions of the clients email might pop up. If the clients email becomes blank after adding it, add the other email adress instead.
Guide for the Client: Accessing Arup InForm via Guest Account
This guide is for external clients who have been invited to access an InForm design. Follow these steps carefully to set up your guest account and access the shared design.
Step 1: Receive and Open the Invitation Email
- Check your email inbox for an invitation from invites@microsoft.com
- The subject line will be similar to: "You're invited to access applications in Arup's organization"
- Check your spam/junk folder if you don't see the email within a few hours
- Open the email and review the invitation details
If you haven't received the invitation email after 24 hours, contact the person who shared the design with you to verify your email address was entered correctly.
Step 2: Accept the Invitation
- In the invitation email, click the Accept invitation or Get Started button
- You will be redirected to a Microsoft sign-in page
- The page will display: "You've been invited to access Arup's applications"
- Click Accept to proceed
Step 3: Sign In or Create an Account
You have two options depending on your existing Microsoft account:
Option A: If you already have a Microsoft account with your work email
- Click Sign in
- Enter your work email address
- Enter your existing Microsoft account password
- Proceed to Step 4
Option B: If you don't have a Microsoft account
- Click Create one! or Sign up now
- Enter your work email address
- Click Next
- Create a password that meets the requirements:
- At least 8 characters long
- Contains uppercase and lowercase letters
- Contains numbers
- Contains special characters
- Complete any additional verification (email code verification)
- Fill in your basic profile information if prompted
Step 4: Enable Two-Step Verification (Multi-Factor Authentication)
Arup requires two-step verification for all accounts, including guest accounts, for security.
4.1 Download the Microsoft Authenticator App
- On your mobile phone, download the Microsoft Authenticator app:
- iOS (iPhone/iPad): Download from App Store
- Android: Download from Google Play
- Install and open the app
4.2 Set Up Two-Step Verification
- On your computer, you'll see a page asking you to set up security verification
- Select Mobile app as your verification method
- Choose Receive notifications for verification (recommended) or Use verification code
- A QR code will appear on your computer screen
4.3 Add Your Account to Authenticator
- In the Microsoft Authenticator app on your phone:
- Tap the + button or Add account
- Select Work or school account
- Choose Scan a QR code
- Point your phone camera at the QR code on your computer screen
- Wait for the app to scan and register the account
- You'll see "Arup" appear in your Authenticator app
4.4 Complete Verification Setup
- On your computer, click Next after scanning the QR code
- You'll receive a test notification on your phone
- Open the notification and tap Approve
- Your two-step verification is now set up!
You'll need your phone with the Microsoft Authenticator app every time you log in to Arup InForm. Make sure the app is installed and accessible.
Step 5: Complete Profile Setup (If Required)
- You may be asked to provide additional information:
- First and last name
- Phone number (optional backup verification)
- Time zone and language preferences
- Fill in the required fields and click Next or Save
Step 6: Access Arup InForm
- Once setup is complete, you'll be redirected to a Microsoft page
- You may see a list of applications you have access to
- Use the direct link provided by the person who shared the design with you
- The link will look like:
https://inform.arup.com/project/[design-id]
- The link will look like:
- Click the link or paste it into your browser
- You may be asked to sign in again - use your email and password
- Approve the login request in your Microsoft Authenticator app when prompted
Congratulations! You now have access to the InForm design and can:
- View and interact with the 3D model
- Adjust parameters and generate variants
- Save your favorite designs
- Share results with your team
If you continue to experience issues, contact the person who invited you or reach out to Arup's IT support through the contact provided in your invitation.